Easiest Way to Play with Virtualization
VMware Player allows anyone to try new operating systems without rebooting. Easy Install makes creating virtual machines with the latest 32-bit and 64-bit Windows and Linux operating systems easier than installing them directly on your PC. Run over 200 supported operating systems including Windows 7, Chrome OS, Ubuntu 10.04, and many other versions of Windows, Linux, and more.
Windows XP has been the most famous and most useful operating system to its users till date. Well even if we are have to migrate to Windows 7, we will never forget the ability of Windows XP. There are a lot of programs which were supported by Windows XP but not in the later versions like Windows Vista and Windows 7. Now when we migrate to Windows 7, we will not be able to run such programs.
In order to solve the problem of incompatibility of software and drivers in Windows 7, we have been given the option of installing Virtual Windows XP using Microsoft Virtual PC. But the lone problem in this option is that the processor should support Virtual Machine.
Here we have given a technique with which you will be able to run Windows XP in Windows 7 without any Virtual XP software or Virtualization Supporting Processor. Moreover you can use your own CD or ISO backup of Windows XP to create the Virtual Machine and no need of downloading the XP Virtual PC from Microsoft.
Requirements:
Windows 7 installed MachineStep 1: Download and Install VMware Player 3.0.1. The download Links are given below.
Minimum 1 GB RAM.
Minimum 4 GB Free Hard Disk Space
Windows XP backup either CD or ISO file
OR
If you have downloaded Microsoft Virtual XP Mode, then refer the instruction at Step 6.
Size: 90.0 MB
Download VMware Player 3.0.1 from VMware
orDownload VMware Player 3.0.1 from FileHippo.com
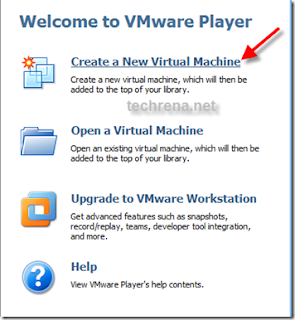
Follow the normal instructions and install. Restart your computer after installation.Step 2: Now we have to create a new Virtual Machine. Open VMware and click Create a New Virtual Machine as shown below.
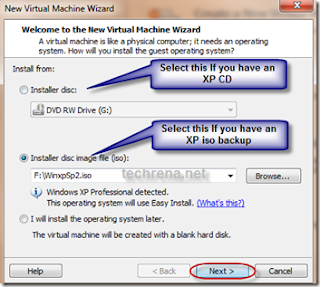
Step 3: Select the location from which you are going to create the new Virtual Machine. If you have a CD then select the drive. If you have a back up file in an iso, then you can select the file.
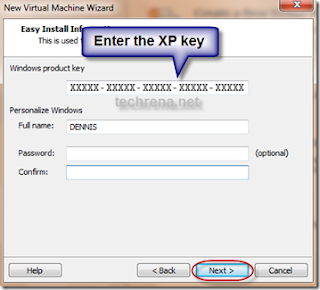
Step 4: Enter the Windows XP key and the user name and password.
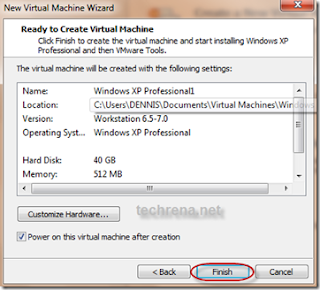
Step 5: Then you can set the location to be installed, maximum Disk space size and the RAM size. Follow the instructions normally. Finish the setup. It will continue to install Windows XP in your Virtual Machine.
Optional Note: While installing the Virtual Machine it may ask you to download VMware Tools for Windows 200 or later. It is recommended that you download it or you can download it later also.

After that, the installation process will continue by itself and Windows XP will start.
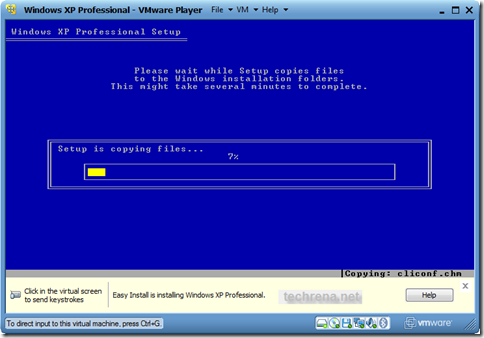
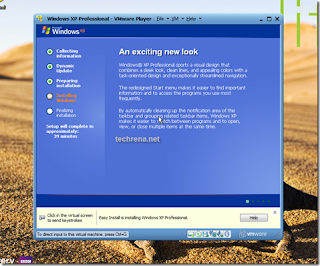
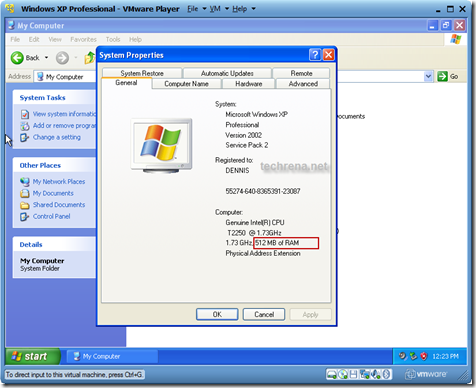
512 MB of RAM is set when installation(you can change the size in VM settings).
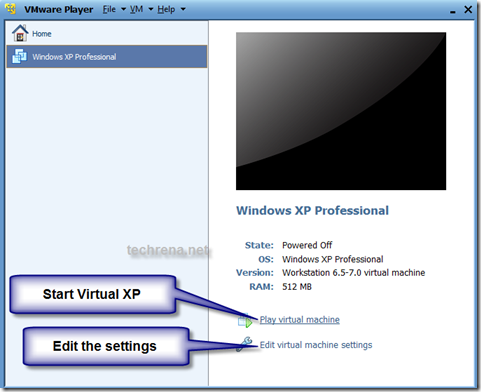
To start the Windows again in virtual mode, open VMware Player and Select Windows XP in the left pane and Click Play virtual machine.
Let us discuss some of the issues which should be known by the users.
How to Transfer Data to and from Windows XP virtual Mode?
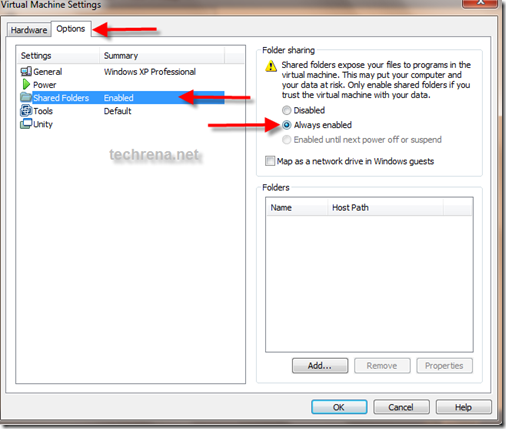
As you are running two different machines drag and drop will not work if you have not installed VMware tools. Even if you can copy directly, it takes more time. You can either use a flash drive or Disc drive to transfer data between Windows 7 and XP virtual mode. But this is not the optimal way. You need to map network drive in Windows 7 which has been shared from Virtual XP.To enable file and folder sharing in Windows XP virtual Mode, you need to edit the settings. Click on Virtual Machine Settings as shown above to edit the settings.
Select Options and select Shared Folders. Set Always enabled and click OK.
Now you need to share a folder with write permission as shown:
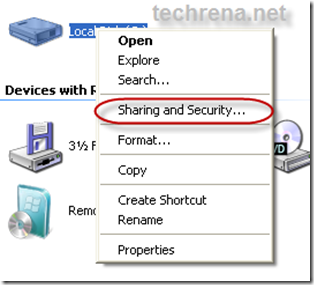
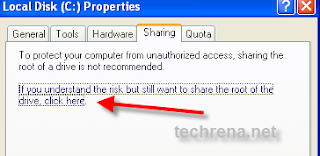
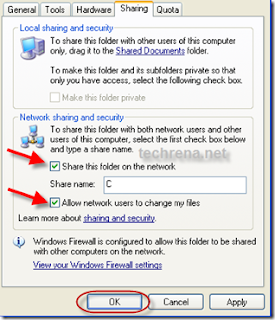
In Windows XP, right click on the folder or drive you want to share and select Share and Security. Do not forget to check Allow network users to change my files.
Now after sharing the folder in Virtual XP, you need to map the folder in Windows 7 as shown below:
Right Click on My Computer and Select Map network drive. Under Network search for the folder you have shared in Virtual XP Machine and click OK.
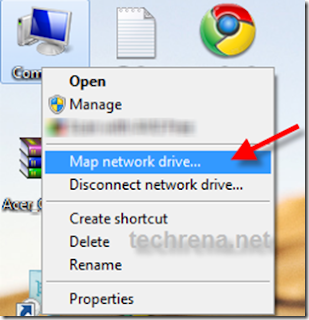
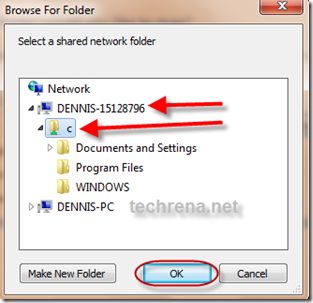
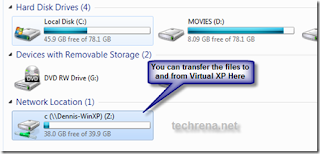
You can copy or paste anything from or to the network location drive in Windows 7. This is how you can transfer files between Windows 7 and Windows XP virtual mode.
Removable Devices:
Now if you want to use a removable device like a flash drive, you can connect the device using the following setting:

You need to disconnect the device from the host in order to connect to the Virtual machine.
Step 6. Running Microsoft’s Windows XP Virtual PC:
All the above installation is not done using the Microsoft’s Virtual Windows XP PC. Above we used normal Windows XP installation CD. If you have downloaded Virtual XP PC from Download Windows XP Mode then, install it on your PC and then you can open the Virtual Machine from the VMware Player as follows.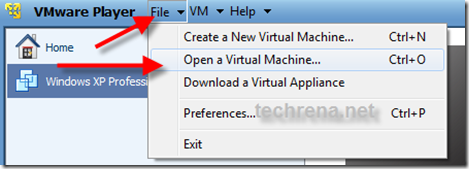
Browse for the .vmx file in the folder you have installed the Virtual XP PC and Click Open. You can run it.
Finally, as you have successfully installed Windows XP Virtual PC in Windows 7 using VMware Player 3.0.1 you can enjoy the unbeatable features of Windows XP in Windows 7 also.
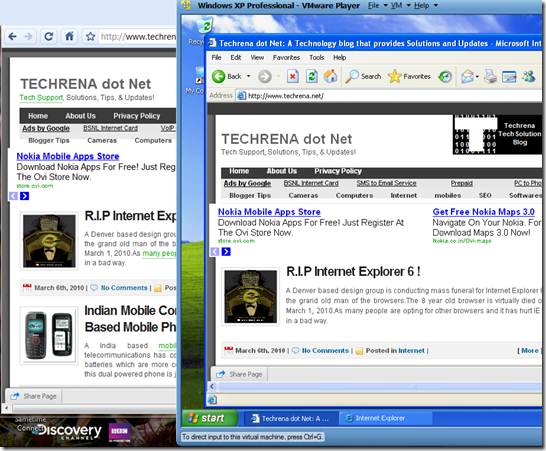
Note: No new Partition is created in your hard disk for the Virtual PC. Just a virtual disk file is created in your drive which will increase in size according to what you copy and install in your Virtual PC. The maximum size of this file is the size you have set as maximum disk size.


-
Follow Us on Twitter!
-
"Join Us on Facebook!
-
RSS
Contact